| T
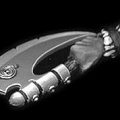
o r s o - Well like mentioned
before, the torso has 4 holes by
this time, one at both points where
the arms would go, one at the top
for the head and one for the leg
part. The only thing left was to
remove a mold line or two, and
sanding it a little. Time to move
on to the legs!
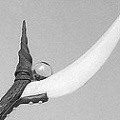
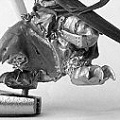
L e g Pa r t -
Like weapons, I (allmost) always
sharpen fangs or claws etc. so they,
like the blades, look mean and sharp.
Equiped with file, knife and sandpaper
I played pedicure for a few minutes,
and after that I took care of some
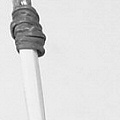
mold lines. Next thing I did is something
strange for some people, I (especially
with larger models) often drill a
1.5mm hole into one of the legs/paws
of a model and use a litle M2 screw
and scew it in. Back and forth, I
force the bolt in, cutting thread
as I go. Remove the metal from the
screw during this procedure that
is forced away and in a few seconds
you tapped thread without using expensive
equipment (this is only possible
because the metal used to make our
models is very soft!) The reason
for doing this is that you now have
a hole you can tightly screw a screw
into and this screw you can hold
with a pair of automatically locking
pliers (or something else, you can
make a little wooden tool with a
piece of M2 thread at the top. You
can rotate your mini onto this tool!),
giving you different angles to hold
the mini without having to thouch
the mini and when finished you can
fasten the mini onto a base with
a screw instead of simply glueing
it on. Also during the converting
stage you can screw the mini onto
the base, looking for a good position
(especially handy with dioramas with
more than 1 mini, when position is
even more important!), without having
to use any glue and so you can still
paint base and mini seperately but
you can think and adjust the pose
of the mini till you find the right
one!
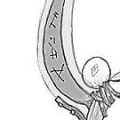
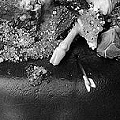
This
works all quite nice, at this stage
I had the base more or less completed,
except for the arrows, they are to
fragile to put on now. The base is
made of something I came across by
accident, it's a piece of wood that
is used to function as the end of
a table leg. In probably your local
DIY shop you can find steel pipe
(+/- 10 cm diameter) that is used
as a table leg and at the floor end
you can fill these with wooden 'thingies(?)'.
When sanded, the round bit that would
go up into the pipe is sawn off,
and repainted, it looks like pic
14 without the rubble :) After a
few coats of paint I started adding
some plastic bits that I got from
an old GW sprue and started adding
very fine sand (use superglue only
for this job, PVA also works, but
it tends to fill up the space between
sandgrains. When you use superglue
it will look like the sand is just
thrown onto the base, and this will
make you're base, when painted, so
much better!!) I screwed the leg
part onto the base and with a marker
marked the spots that needed more
sand to make sure the mini wouldn't
look as if it were flying. It stands
in a firm position, so it has to
stadn solidly into the sand, so after
scewing and unscrewing the leg part
a few times, and adding sand, the
leg part stood perfectly onto the
base.
After
this it was time for the rubble,
little stones, the skeleton, the
sand (I used the very fine stuff
in the first stage. I use 3 different
sizes, so I had 2 more left. Don't
use the bigger stuf everywhere, use
it in the lower places, where it
would roll to if it was real, and
leave some area's covert only with
the fine stuff, creating different
surfaces!) |